


A ceiling fan can really make your home so much more comfortable, whether it’s hot outside or cold. And it’s relatively easy to put one in yourself. If you don’t have an existing light fixture or fan in the room where you want to hang your new fan, you’ll need to get an electrician to run wiring to the spot where you want to hang the fan. But if you already have a light fixture or fan in that place, it’s just a matter of swapping it out for the new one. Here’s how it’s done.
Table of Contents
Shut Off the Power at the Breaker
Shutting off the power to the circuit is a vital first step before you attempt any home wiring work. Go to your home breaker box and figure out which breaker controls the circuit you’ll be working on. Your breaker box should be labeled as to which breaker controls which circuit, but if yours isn’t properly labeled, you will need to figure it out. Once you have shut off the breaker that controls the circuit you’ll be connecting your new fan to, you should go to the room and test the lights or use a voltage tester to ensure that the power to the circuit is indeed off.
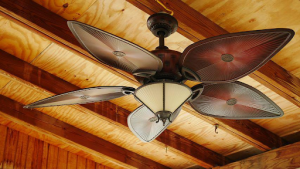
Take Down the Old Fixture and Inspect Your Ceiling
Take down your old ceiling fan in pieces so you don’t drop it on yourself. Remove the fan blades first. If the fan has a large light fixture attached, you can remove that too before you take down the fan motor. Unscrew the fan canopy from the ceiling, unseat the downrod, and remove the ceiling mounting plate.
If you’re taking down an old light fixture, you can probably take it down all at once, unless it’s something big like a chandelier. Remove the globe or glass cover, take out the light bulbs, and then unscrew the screws in the base of the light fixture. Pull the light fixture down from the ceiling and disconnect the wiring in the electrical box.
Install a Fan Brace and Fan-Rated Electrical Box, If You Need Them
Replacing an old ceiling fan with a new one can get you a quieter, more powerful fan motor and you can even get chandelier ceiling fans and other fans with lights built in. If you’ve already had a fan in the place where you want to install the new fan, you probably won’t have to install a fan brace or put up a fan–rated electrical box. Inspect the setup inside your ceiling to make sure there’s an adequate fan brace, or that the fan will be anchored directly to a ceiling joist. Examine the outside of the junction box for its weight rating. It should be rated for enough weight to hold up your new ceiling fan – check the fan box to figure out how much the new fan weighs.
If you don’t have a fan brace in your ceiling, you can secure the fan to the joist if the joist is located above the hole in your ceiling. If your fixture was between joists, you need to install a fan brace in your ceiling. You can pop an expanding metal fan brace up through the hole in your ceiling and secure it to the joists on either side from below. Attach a fan-rated pancake electrical box to the fan brace and draw the wiring from the house down into the electrical box.
Put Up the New Fan Motor
Once your fan brace is in position, you can hang up the fan motor. First, you will have to do some assembly of the fan motor on the floor or on a table before you carry it up the ladder to install it. Your fan should come with instructions to help you put together the fan motor. You will probably need to connect a downrod to the fan motor, or if you’ve bought a flush mount fan, you may connect the fan canopy directly to the top of the fan motor. Make sure the wiring from the motor is coming out of the top of the downrod or canopy so you can connect it to the house wiring.
With the fan motor assembled, it’s time to get up on a ladder and install it to the ceiling. First, you’ll attach the mounting plate to the electrical box on the ceiling. There should be a hook on the mounting plate that will allow you to hang the fan motor to one side while you’re making the wiring connections. There should be three wires coming out of your ceiling: a black, a white, and a green or bare. These should correspond to the three wires coming out of the fan motor. Match the colors together when you’re connecting the wires – black should connect to black, white to white, and so forth. The green or bare wire is the ground wire, so make sure you wrap the exposed ends around the green ground screw in the electrical box (and secure it by giving the screw a twist or two) before you connect it to the ground wire coming out of the fan. Wrap the bare ends of the wires together and secure those connections with plastic wire nuts.
Once you have connected the wiring, you can follow the fan installation instructions to seat the downrod into the ceiling mounting plate. Attach the fan canopy in place over the mounting plate.
Add the Finishing Touches
Now it’s time to put the fan blades on and connect the light fixture to your fan. Each fan blade should be equidistant from the floor so the fan doesn’t get unbalanced.
You will most likely have to wire up the fan light fixture the same way you wired up the fan motor – by connecting wires in the light fixture to the corresponding wires coming out of the bottom of your fan motor. Once the light fixture is wired up, attach the fixture to the fan motor housing with the provided screws, put in some light bulbs, turn on the breaker and take your fan for a test run.